
Set your business hours and holiday closures
Quick answer
Go to Settings, then Workspace Settings, and open Availability & Hours to set your weekly schedule and your holiday and closure dates. When your AI assistant passes a chat to your team outside those hours, the customer gets your off-hour message, timed by the Workspace Timezone on the General tab.
It is the week before Hari Raya. Your outlets close for three days, half the team is going balik kampung, and customers will still message on the second morning asking if you deliver. You want every one of them to get a clear answer, without anyone checking the shop phone from their hometown.
Workspace Settings is where you tell HeyBirdy when your business is open. Set your hours once, mark the Hari Raya closure, and any customer your AI assistant passes to the team while you are away gets your off-hour message, not a promise that someone is on the way.
On this page you can:
- Set the time zone your opening hours run on.
- Choose the agents who pick up chats when nobody is scheduled.
- Set opening hours for each day, including a break between lunch and dinner.
- Tell customers when you are back if their chat needs your team after hours.
- Mark public holidays and closures, each with its own off-hour message.
Before you start
- You are signed in as an Admin. Settings does not appear for Support Agents.
Set your workspace time zone
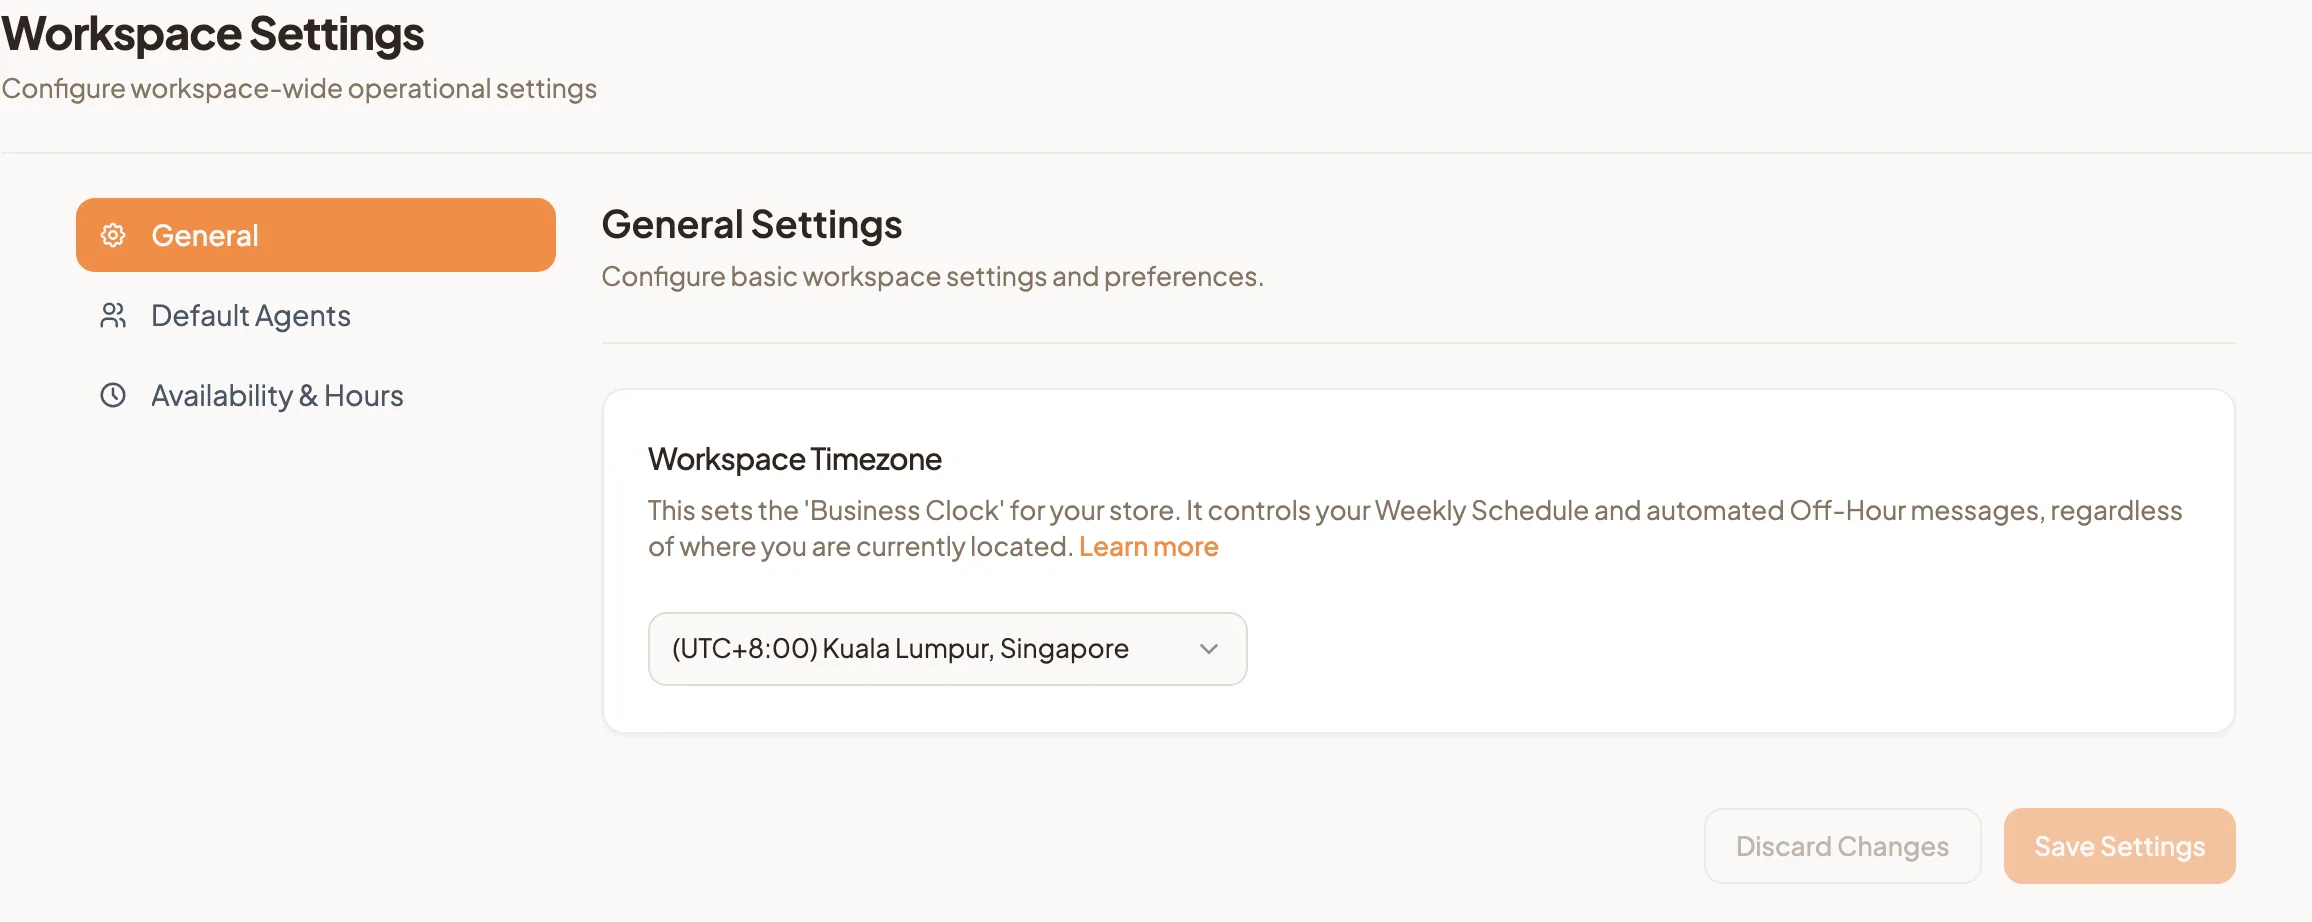
Your workspace time zone is the "Business Clock" for your store. It decides when your store closes for customers, and it runs your Weekly Schedule, Off-Hour Messages and Performance Reports.
- Go to Settings, then Workspace Settings. The General tab opens.
- Under Workspace Timezone, choose the time zone your outlets run on.
- Select Save Settings.
How it differs from your own time zone
HeyBirdy keeps two clocks apart, so a trip abroad never changes when your shop "closes".
| Workspace Timezone | Your own time zone | |
|---|---|---|
| Where you set it | Workspace Settings, General tab | Your profile |
| What it controls | Store hours, off-hour messages and performance reports | How you see timestamps in the inbox, chat history and analytics |
| Who it affects | Your customers | Only you |
If your store is in Kuala Lumpur and you are in London for a week, the closed message still goes out at closing time Malaysia time. Select Learn more under Workspace Timezone to see this with examples.
Choose default agents
Default agents take the chats that come in during any time without a specific assignment.
- Open the Default Agents tab.
- Open the list under Select Default Agents. Search by name and tick the agents you want. Only active team members are listed.
- Select Save Settings. At least one agent must be selected.
To put particular agents on particular hours, use Agent Assignment. Default agents cover whatever that schedule leaves open.
Set your working hours
- Open the Availability & Hours tab.
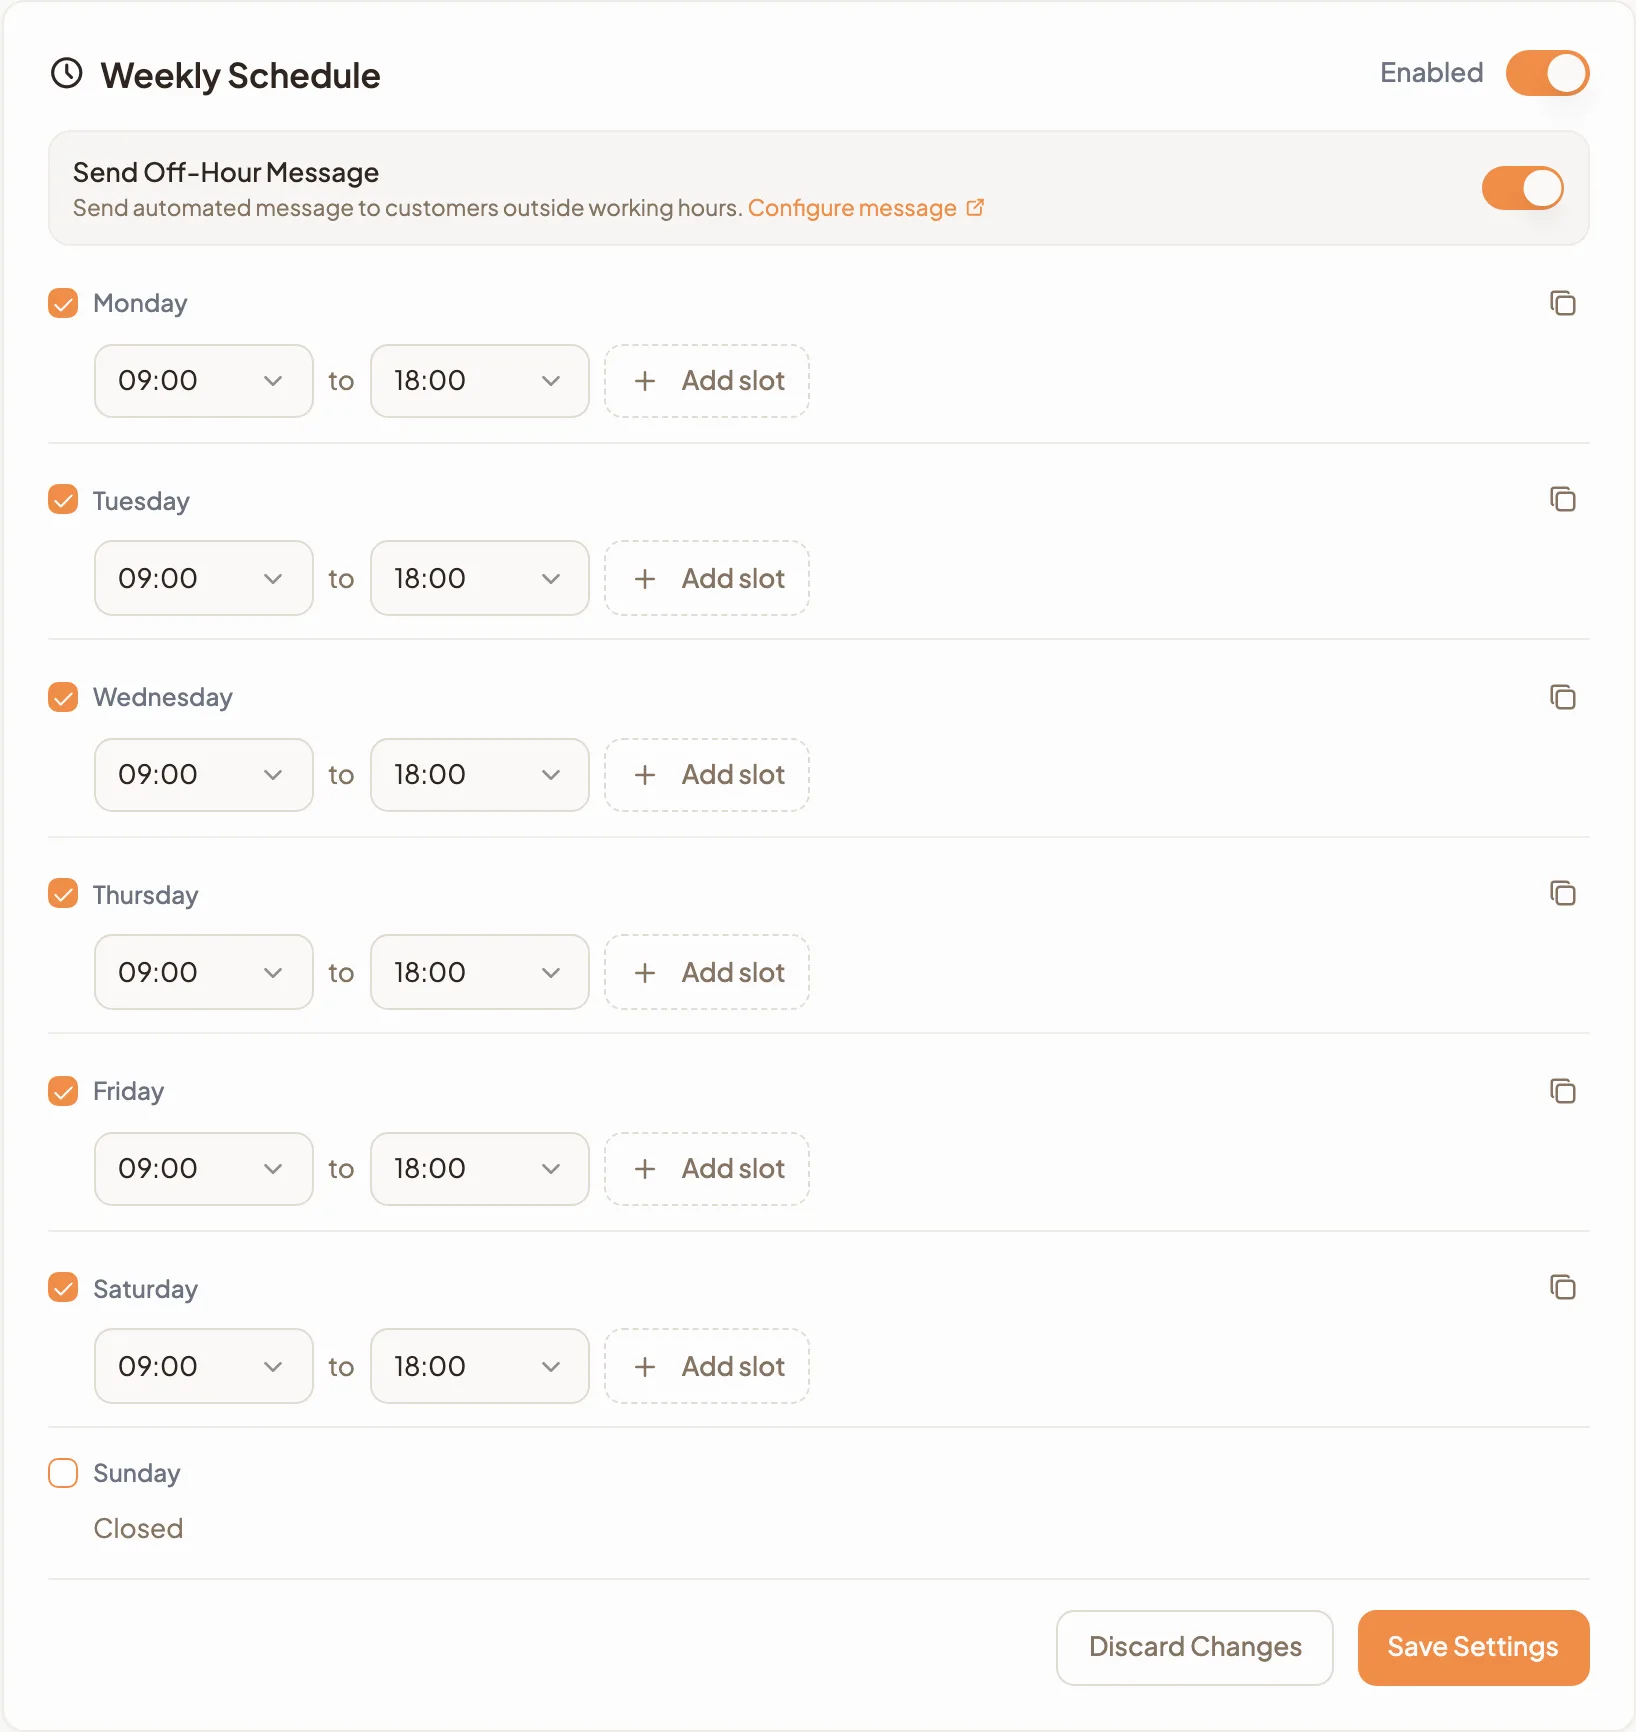
- If you see Weekly Schedule is disabled, select Enable Weekly Schedule. You can also use the switch beside Weekly Schedule.
- Tick each day you open. A newly ticked day starts at 09:00 to 18:00.
- Choose the start and end time for the day. Times are in 24-hour format, in 15-minute steps.
- If you close between services, select Add slot and set the second slot, for example 11:00 to 15:00, then 17:30 to 22:00. Select the bin icon beside a slot to remove it.
- Untick a day you do not open. It shows as Closed.
- Select Save Settings.
Slots on the same day never overlap. If you push a slot's end time later, the slot after it moves along with it.
Copy one day's hours to other days
- Set up one day the way you want it.
- Select the copy icon at the right of that day.
- Under Copy to:, every other day is ticked. Untick the days you want to keep as they are.
- Select Apply, then Save Settings.
Monday to Friday is one day's work instead of five.
Send an off-hour message
When the weekly schedule is on, the Send Off-Hour Message switch sits at the top of it. Your AI assistant keeps answering the questions it can at any hour. When it passes a chat to your team outside working hours, this switch decides the reply: turned on, the customer gets your off-hour message instead of the usual handover message, so nobody waits for an agent who has gone home.
- Turn on Send Off-Hour Message.
- Select Configure message to change the wording. It opens the Off-Hours Reply in Automated Messages in a new tab.
- Back here, select Save Settings.
The 11pm catering request now gets an honest "we will reply at 9am", and you get to sleep.
Add a holiday or closure
Holiday and closure dates apply regardless of the weekly schedule, so you do not have to change your normal hours for Hari Raya and change them back afterwards.
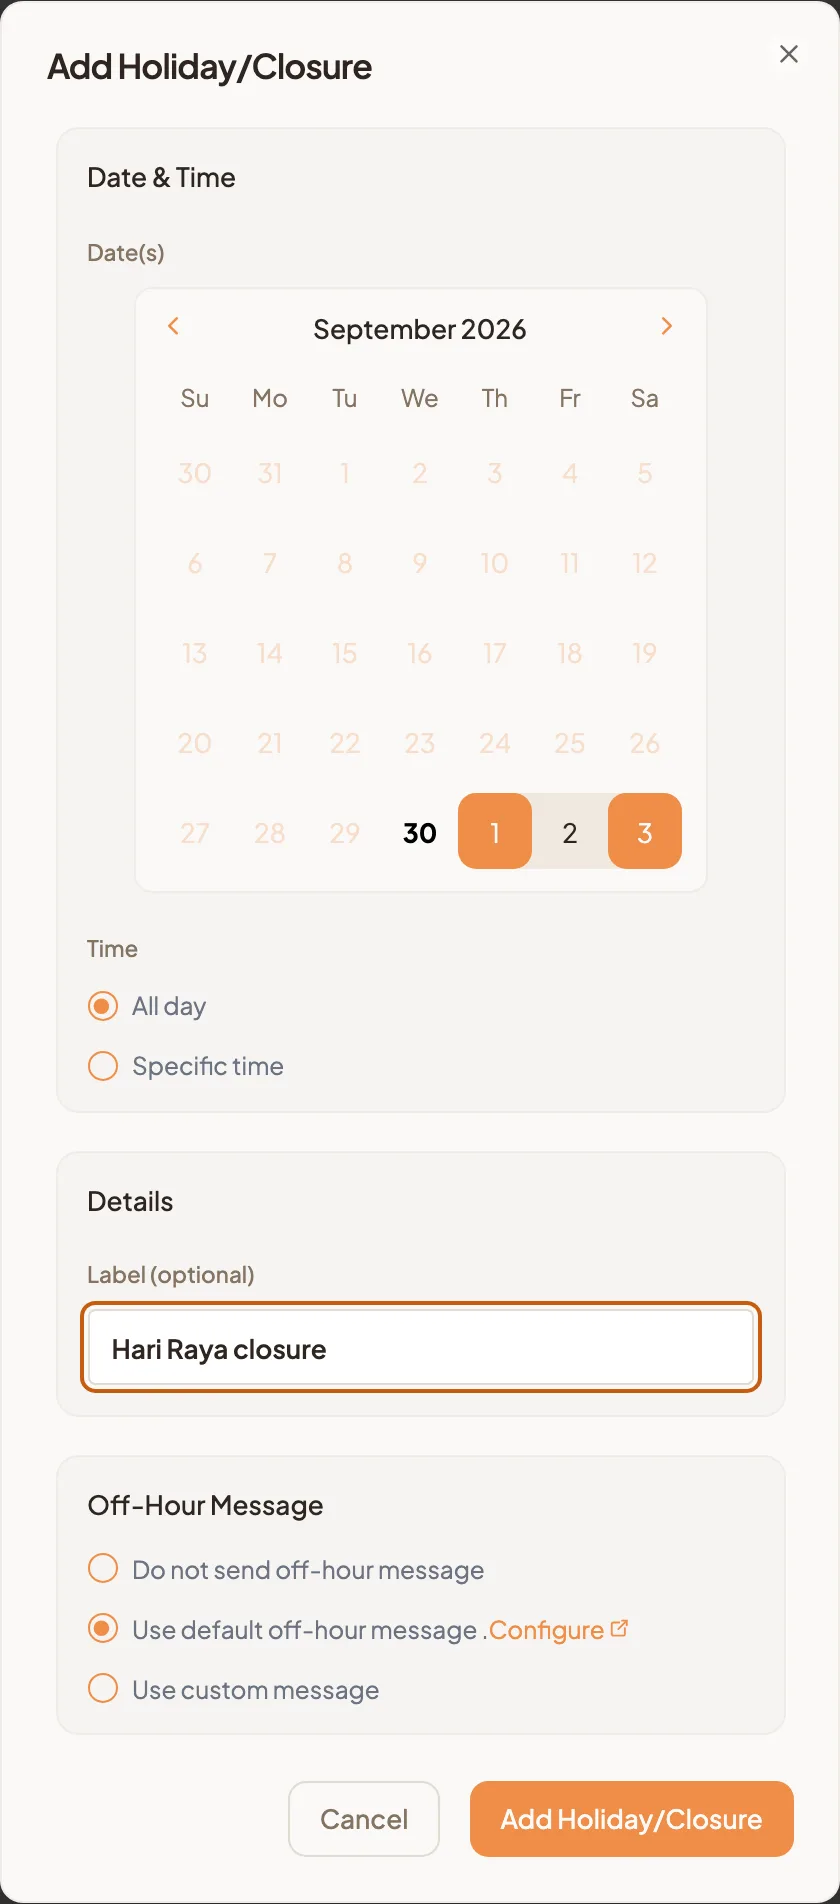
- Under Holiday & Closure Dates, select Add Holiday/Closure.
- In Date(s), select the first day, then the last day. For a single day, select it once. Past dates cannot be chosen.
- Under Time, keep All day, or choose Specific time and set a start and end time. Use this for a half day, such as closing at 15:00 on the eve of Hari Raya.
- In Label (optional), name it, for example "Hari Raya Aidilfitri".
- Under Off-Hour Message, choose what customers get when your AI assistant passes their chat to your team during the closure:
- Use default off-hour message sends your usual off-hours reply.
- Use custom message lets you write a message for this closure only, such as when you reopen.
- Do not send off-hour message sends the standard handover message, the same as during opening hours.
- Select Add Holiday/Closure.
Edit or delete a holiday or closure
Your closures are listed under Holiday & Closure Dates with their Date & Label, Time, Off-Hour Message and Status. The status is Active or Past. Search by label or date, or filter by Status and Date Range, and select Reset to clear the filters.
To change one:
- Select its date in the Date & Label column.
- Make your changes, then select Save Changes.
To delete one:
- Select its date in the Date & Label column.
- Select Delete, then confirm with Delete.
Set it up in the week before a holiday and the whole break looks after itself, from the first "are you open?" to the morning you reopen.