
Edit your WhatsApp auto replies and greeting messages
Quick answer
Go to Settings, then Automated Messages, pick a message from the list, edit its title, body, footer and buttons, and select Save Settings. Changes apply to all new conversations, and Reset to Default brings back the original wording whenever you want it.
Raya was three weeks ago. Every new customer who says hi still gets a greeting that talks about the Ramadan buffet, and a regular has already asked whether it is still on.
Automated messages are the replies HeyBirdy sends on its own at set moments: when someone messages you for the first time, checks their points, asks for a menu, or needs your team after closing. Each one can be rewritten in your own voice, so the greeting says what is true today.
On this page you can:
- Rewrite the title, body and footer of each message and watch the preview update as you type.
- Choose which reply buttons appear, rename them and change their order.
- Write the off-hours reply customers get when their chat is passed to your team after closing.
- Switch the inactivity follow-up on or off.
- Go back to the default wording at any time.
Before you start
- You are signed in as an Admin.
- For the off-hours reply, your working hours are set in Workspace Settings.
How the list is organised
Go to Settings, then Automated Messages. The messages are grouped by the moment they are sent. Select one and the top of the page tells you exactly when it goes out.
| Group | What it covers | Examples |
|---|---|---|
| Support | Off-hours, handing over to your team, and asking for contact details | Off-Hours Reply, Hand Over to Human, No Agents Available, Inactivity Follow-Up |
| Greetings | The first thing customers see when they message in | Non-Member Greeting, Member Greeting, Returning Member |
| Sign-Up | Joining your loyalty programme | Join Member Pitch, Sign-Up Process, Successful Sign-Up |
| Loyalty & Rewards | Points, stamps and vouchers | View Points / Stamps, Rewards Catalogue, My Rewards, No Active Rewards |
| Ordering | Ordering, menus, outlets and deals | Order Now, Browse Menu, Store Locations, Promotions |
| Errors | What customers see when something cannot be handled | Unsupported File Type, File Size Exceeded, General Error |
The list only shows the messages that apply to your workspace. A workspace without a loyalty programme, for example, does not see the Sign-Up or Loyalty & Rewards messages.
Edit a message
- Select the message in the list.
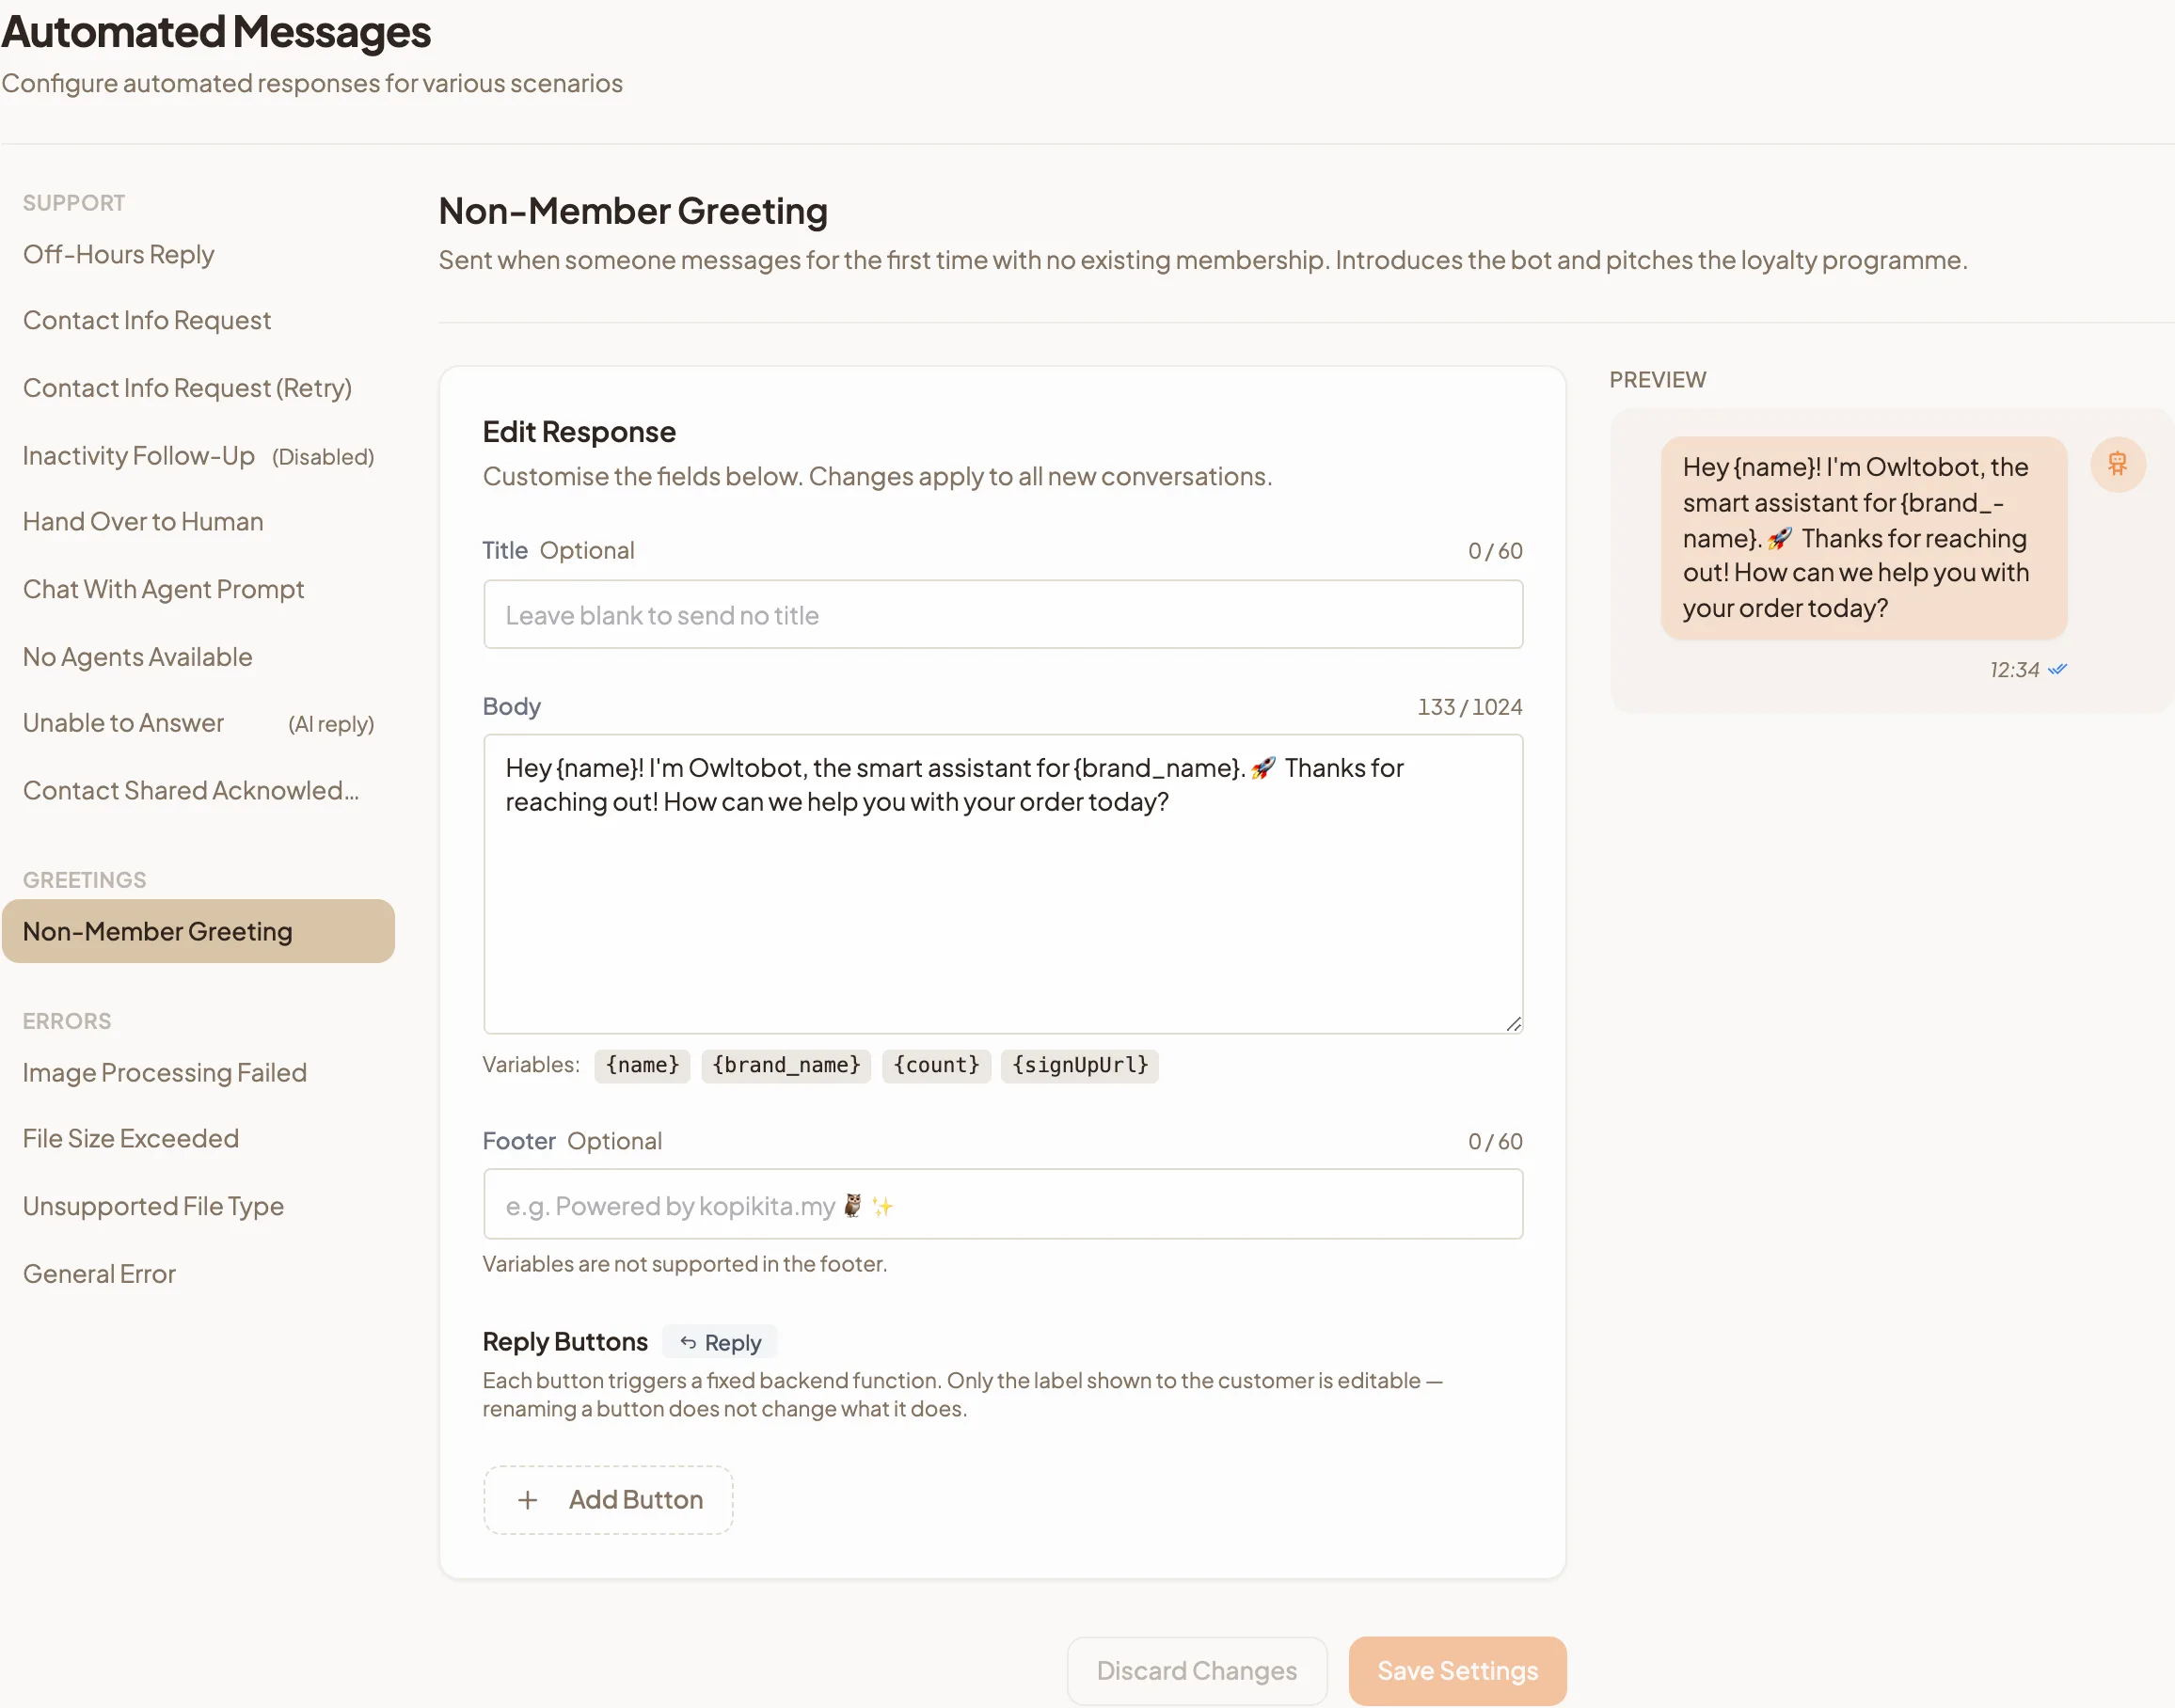
- Under Edit Response, change the fields you want:
- Title is optional. Leave it blank to send no title. Up to 60 characters.
- Body is the message itself. Up to 1,024 characters.
- Footer is optional, a short line at the bottom. Up to 60 characters.
- Check the Preview beside the form. It shows the message the way it looks in WhatsApp.
- Select Save Settings.
Changes apply to all new conversations. Discard Changes takes the form back to what was last saved. If you pick another message before saving, HeyBirdy asks first, so you choose Discard and Switch or Stay Here rather than losing your edits by accident.
The character limits are WhatsApp's own. A field over its limit turns red, and Save Settings stays unavailable until you shorten it.
Personalise the body with variables
The words in curly brackets under Body fill themselves in when the message is sent. Type them exactly as shown.
{name}becomes the customer's name, or "customer" if HeyBirdy does not have one.{brand_name}becomes your workspace name.{count}becomes the customer's stamps or points balance, in View Points / Stamps.{signUpUrl}becomes your sign-up link, in Membership Access Barrier.
Variables are not supported in the footer.
Hi {name}, welcome back to {brand_name} reads as "Hi Aisyah, welcome back to Kopi Corner" on her phone.
Messages with only a body
Contact Info Request and Contact Info Request (Retry) ask the customer to share their phone number. WhatsApp adds its own Share Contact Info button to these, so only the body can be edited, and it cannot be left blank.
Choose the reply buttons
Messages that carry buttons have a Reply Buttons section. A badge beside the heading shows the kind of button: Reply, Link or List.
Each button starts a fixed step, such as showing store locations or handing the chat to an agent. You choose which buttons appear and what they say. Renaming a button does not change what it does.
Add, rename and reorder buttons
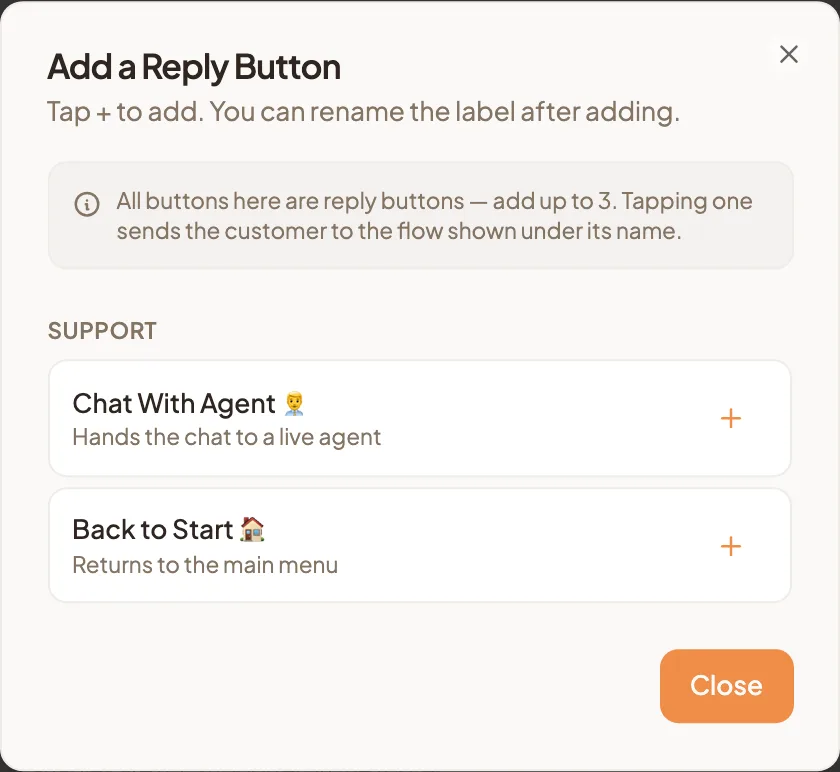
- Select Add Button. The Add a Reply Button list opens, grouped into Loyalty, Ordering and Support.
- Each option shows what it triggers, for example "Shows store locations" or "Hands the chat to a live agent". Select the plus icon beside the one you want. Buttons already on the message are marked Added.
- Type a new label over the default if you want one. Labels can be up to 20 characters.
- Drag a button by its handle to change the order. Select the remove icon to take one off.
- Select Save Settings.
A message can have up to 3 buttons. Once you reach 3, the button reads Add Button (Max 3 Reached).
Messages with one fixed button
Some messages carry one fixed button, and the Reply Buttons section says so. You can change its label, and HeyBirdy handles where it goes.
Brand picker messages
Messages that ask the customer to pick a brand show Buttons are Auto-Generated per Brand. HeyBirdy adds one button for each brand registered under your workspace when the message is sent. You cannot edit those buttons here, and they always stay in step with your brand setup.
Loyalty messages follow your loyalty mode
Your workspace runs one loyalty mode: points, stamps or tier. The button choices you see only include the ones that fit your mode, so you cannot add a stamps button to a points programme by mistake.
On View Points / Stamps, a line under Reply Buttons tells you which mode your workspace uses, for example "This workspace uses Points loyalty mode. Other variants are hidden."
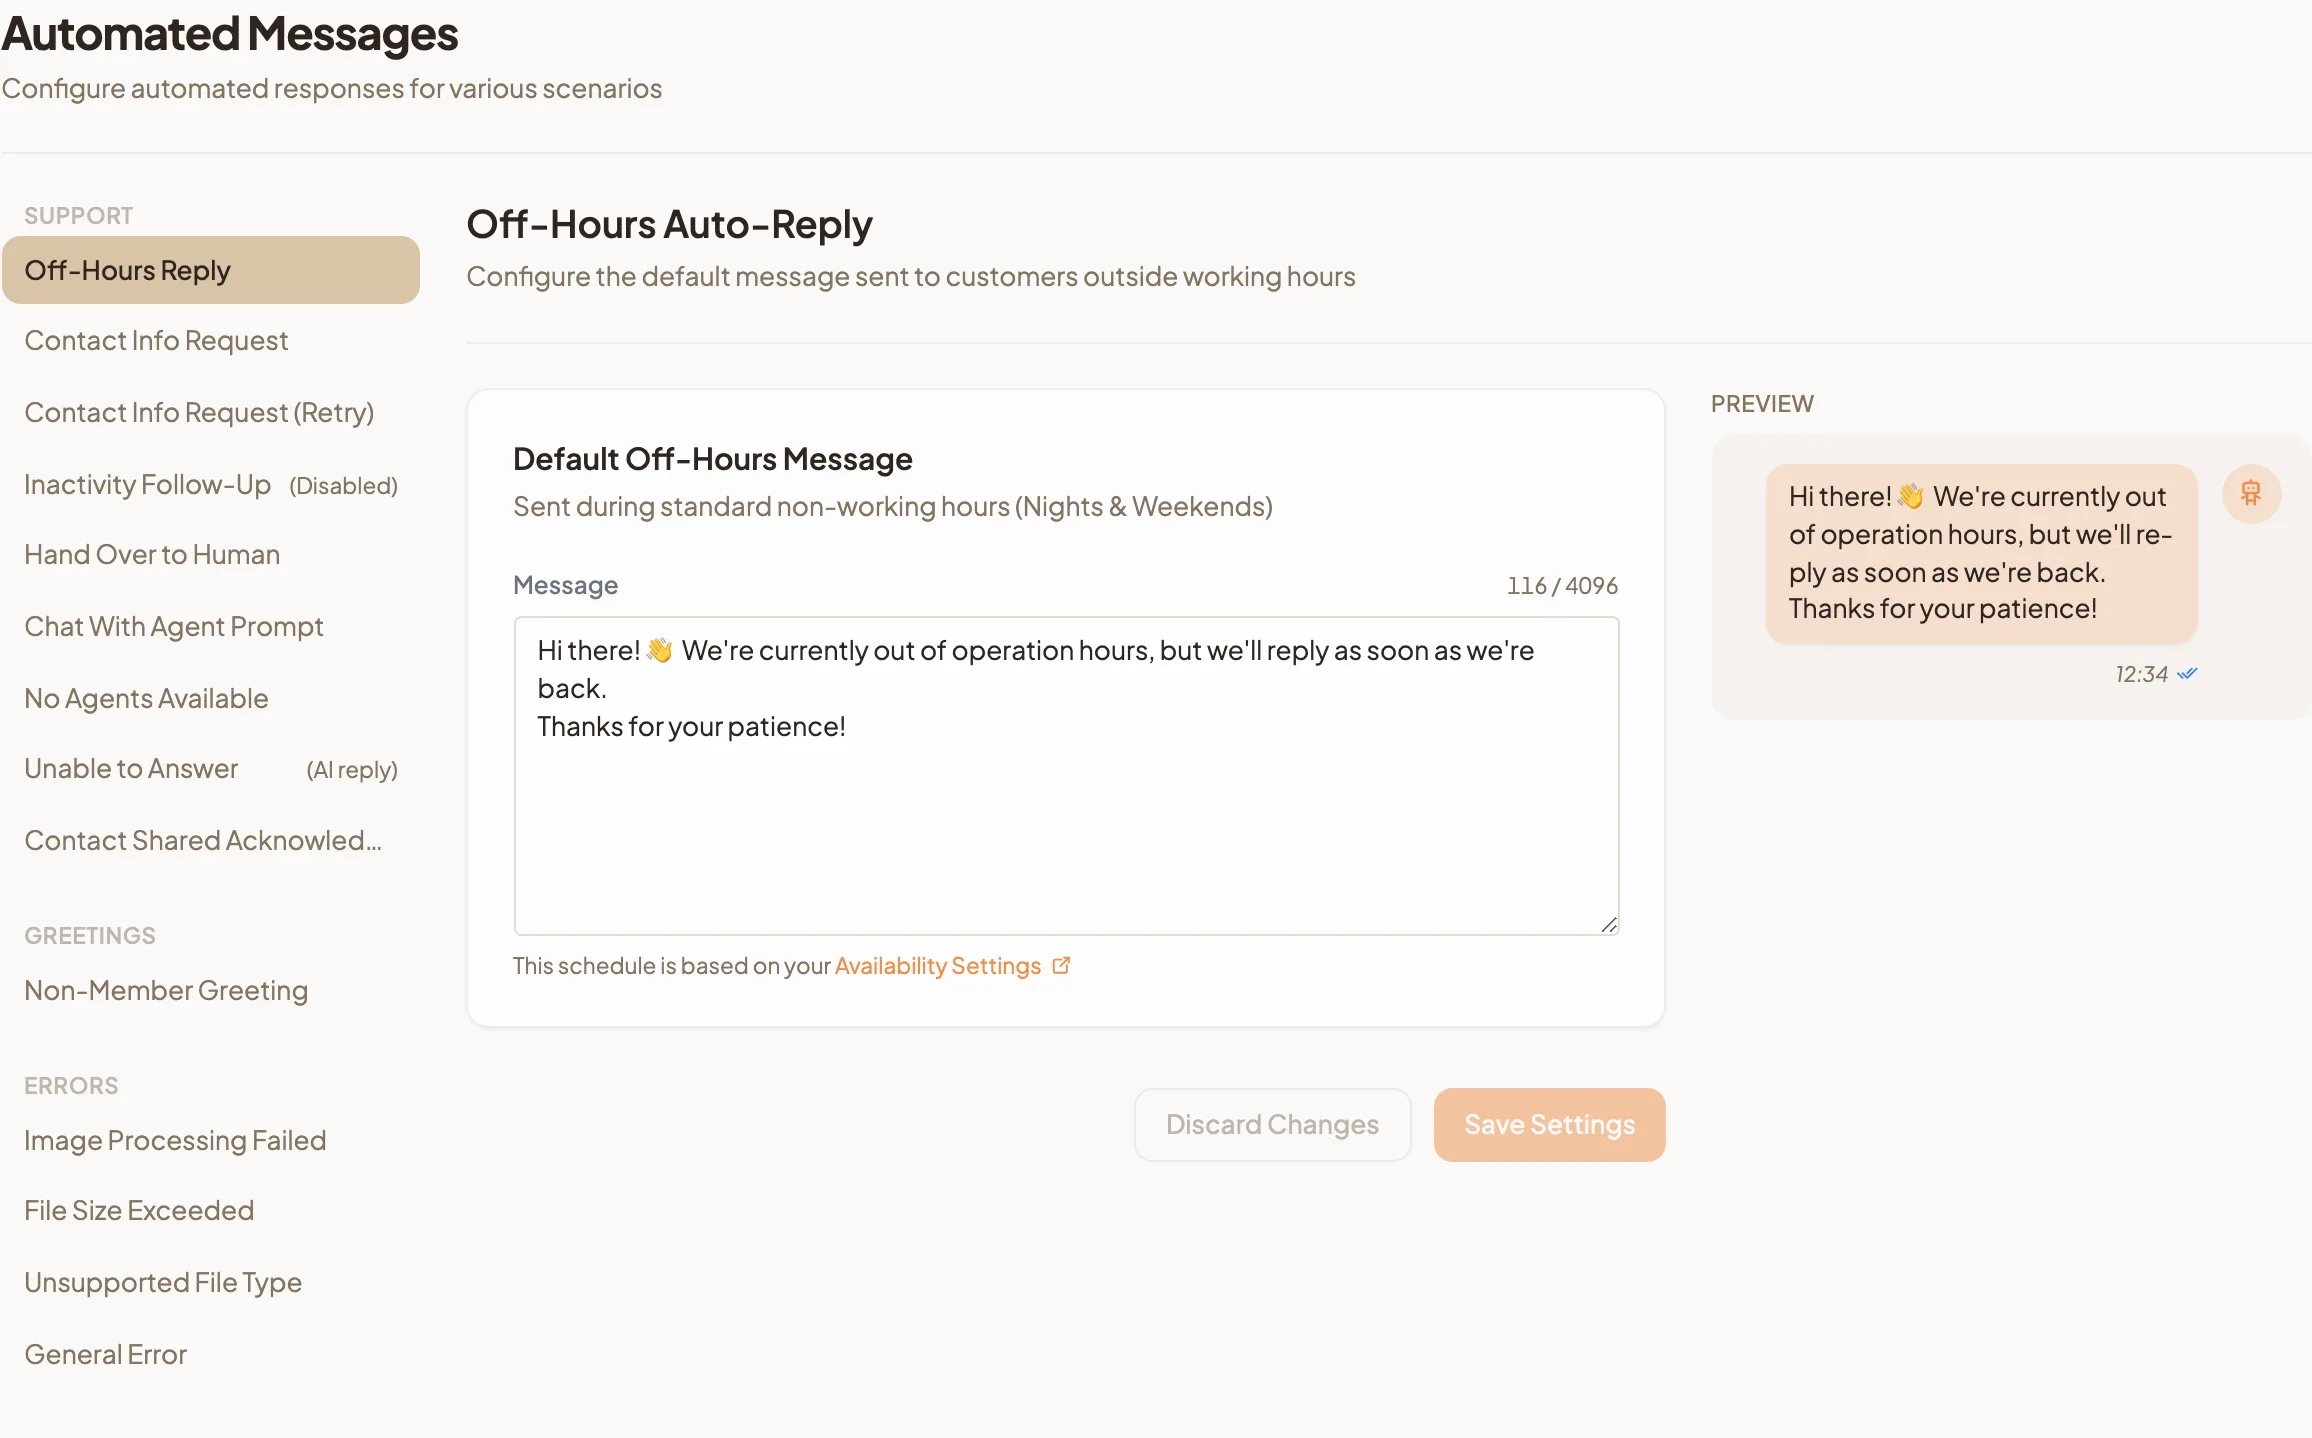
Set the off-hours reply
- Select Off-Hours Reply, the first message under Support.
- Under Default Off-Hours Message, type the reply in Message. It can be up to 4,096 characters.
- Select Save Settings.
This reply replaces the usual handover message when your AI assistant passes a chat to your team outside the working hours you set in Workspace Settings. Questions your assistant can answer still get a normal answer at any hour. Select Availability Settings under the message to go straight there. That is also where you turn off-hour messages on, and where a holiday closure can use this reply or a message of its own.
Switch the inactivity follow-up on or off
Inactivity Follow-Up checks in with a customer who has gone quiet in the conversation. It has its own switch beside its title.
- Turn the switch on or off. It saves straight away, without Save Settings.
- While it is off, the list shows (Disabled) after its name.
- You can still edit the wording while it is off, ready for when you turn it back on.
Go back to the default wording
Reset to Default appears on any message you have changed.
- Select Reset to Default.
- Select Load Defaults.
- The form fills with the default wording. Nothing changes for customers yet.
- Select Save Settings to use it.
The next customer who says hi gets a greeting that is true today, in your words, with buttons that take them where they want to go.