
Create and manage API keys for your POS or ordering system
Quick answer
Go to Settings, then API Keys, select Create API Key, give it a name, tick what it is allowed to do, pick an expiry and select Create. Copy the key straight away, because it is shown only once.
Your ordering platform can send each customer a WhatsApp message the moment the kitchen marks their order ready. Their support team says they only need one thing from you to switch it on: an API key for HeyBirdy.
An API key lets another system, such as your POS or ordering platform, work with your HeyBirdy workspace on your behalf. Think of it as a password for software. You decide what each key is allowed to do, and you can switch it off at any time.
On this page you can:
- Create a key for each system you connect, with only the access it needs.
- Choose how long a key lasts.
- See which keys exist, when they expire and when they were last used.
- Revoke a key you no longer use.
- Check the calls each key has made.
Before you start
- You are signed in as an Admin.
- You know which system the key is for, and what it needs to do. Ask that system's provider which access to give it.
Create an API key
- Go to Settings, then API Keys. The API Keys tab opens.
- Select Create API Key.
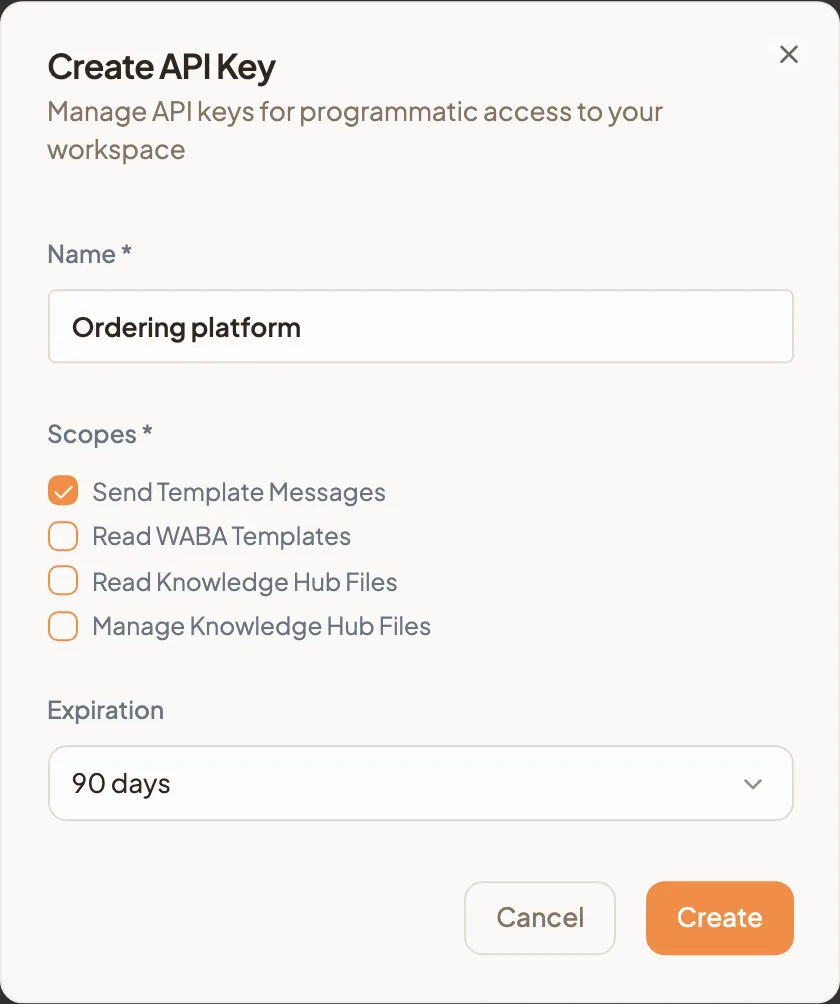
- In Name, name the key after the system that will use it, for example "Ordering platform". A name is required.
- Under Scopes, tick what the key is allowed to do. Tick at least one.
- Under Expiration, choose how long the key lasts.
- Select Create.
| Scope | What it allows |
|---|---|
| Send Template Messages | Send your WhatsApp templates to customers |
| Read WABA Templates | Read the WhatsApp templates in your account |
| Read Knowledge Hub Files | Read the files in your Knowledge Hub |
| Manage Knowledge Hub Files | Manage the files in your Knowledge Hub |
For Expiration, choose 30 days, 90 days, 1 year or Never. 90 days is selected to start with.
Copy your key before you close the window
When the key is created, the API Key Created window shows the full key once, with the reminder "Copy this key now. You won't be able to see it again."
- Select the copy icon beside the key.
- Paste it where the other system asks for it.
- Select Done.
Keep the key as private as a password. Anyone who has it can do whatever its scopes allow.
If you lose a key, create a new one, give it to the system, and revoke the old one.
See your keys and their details
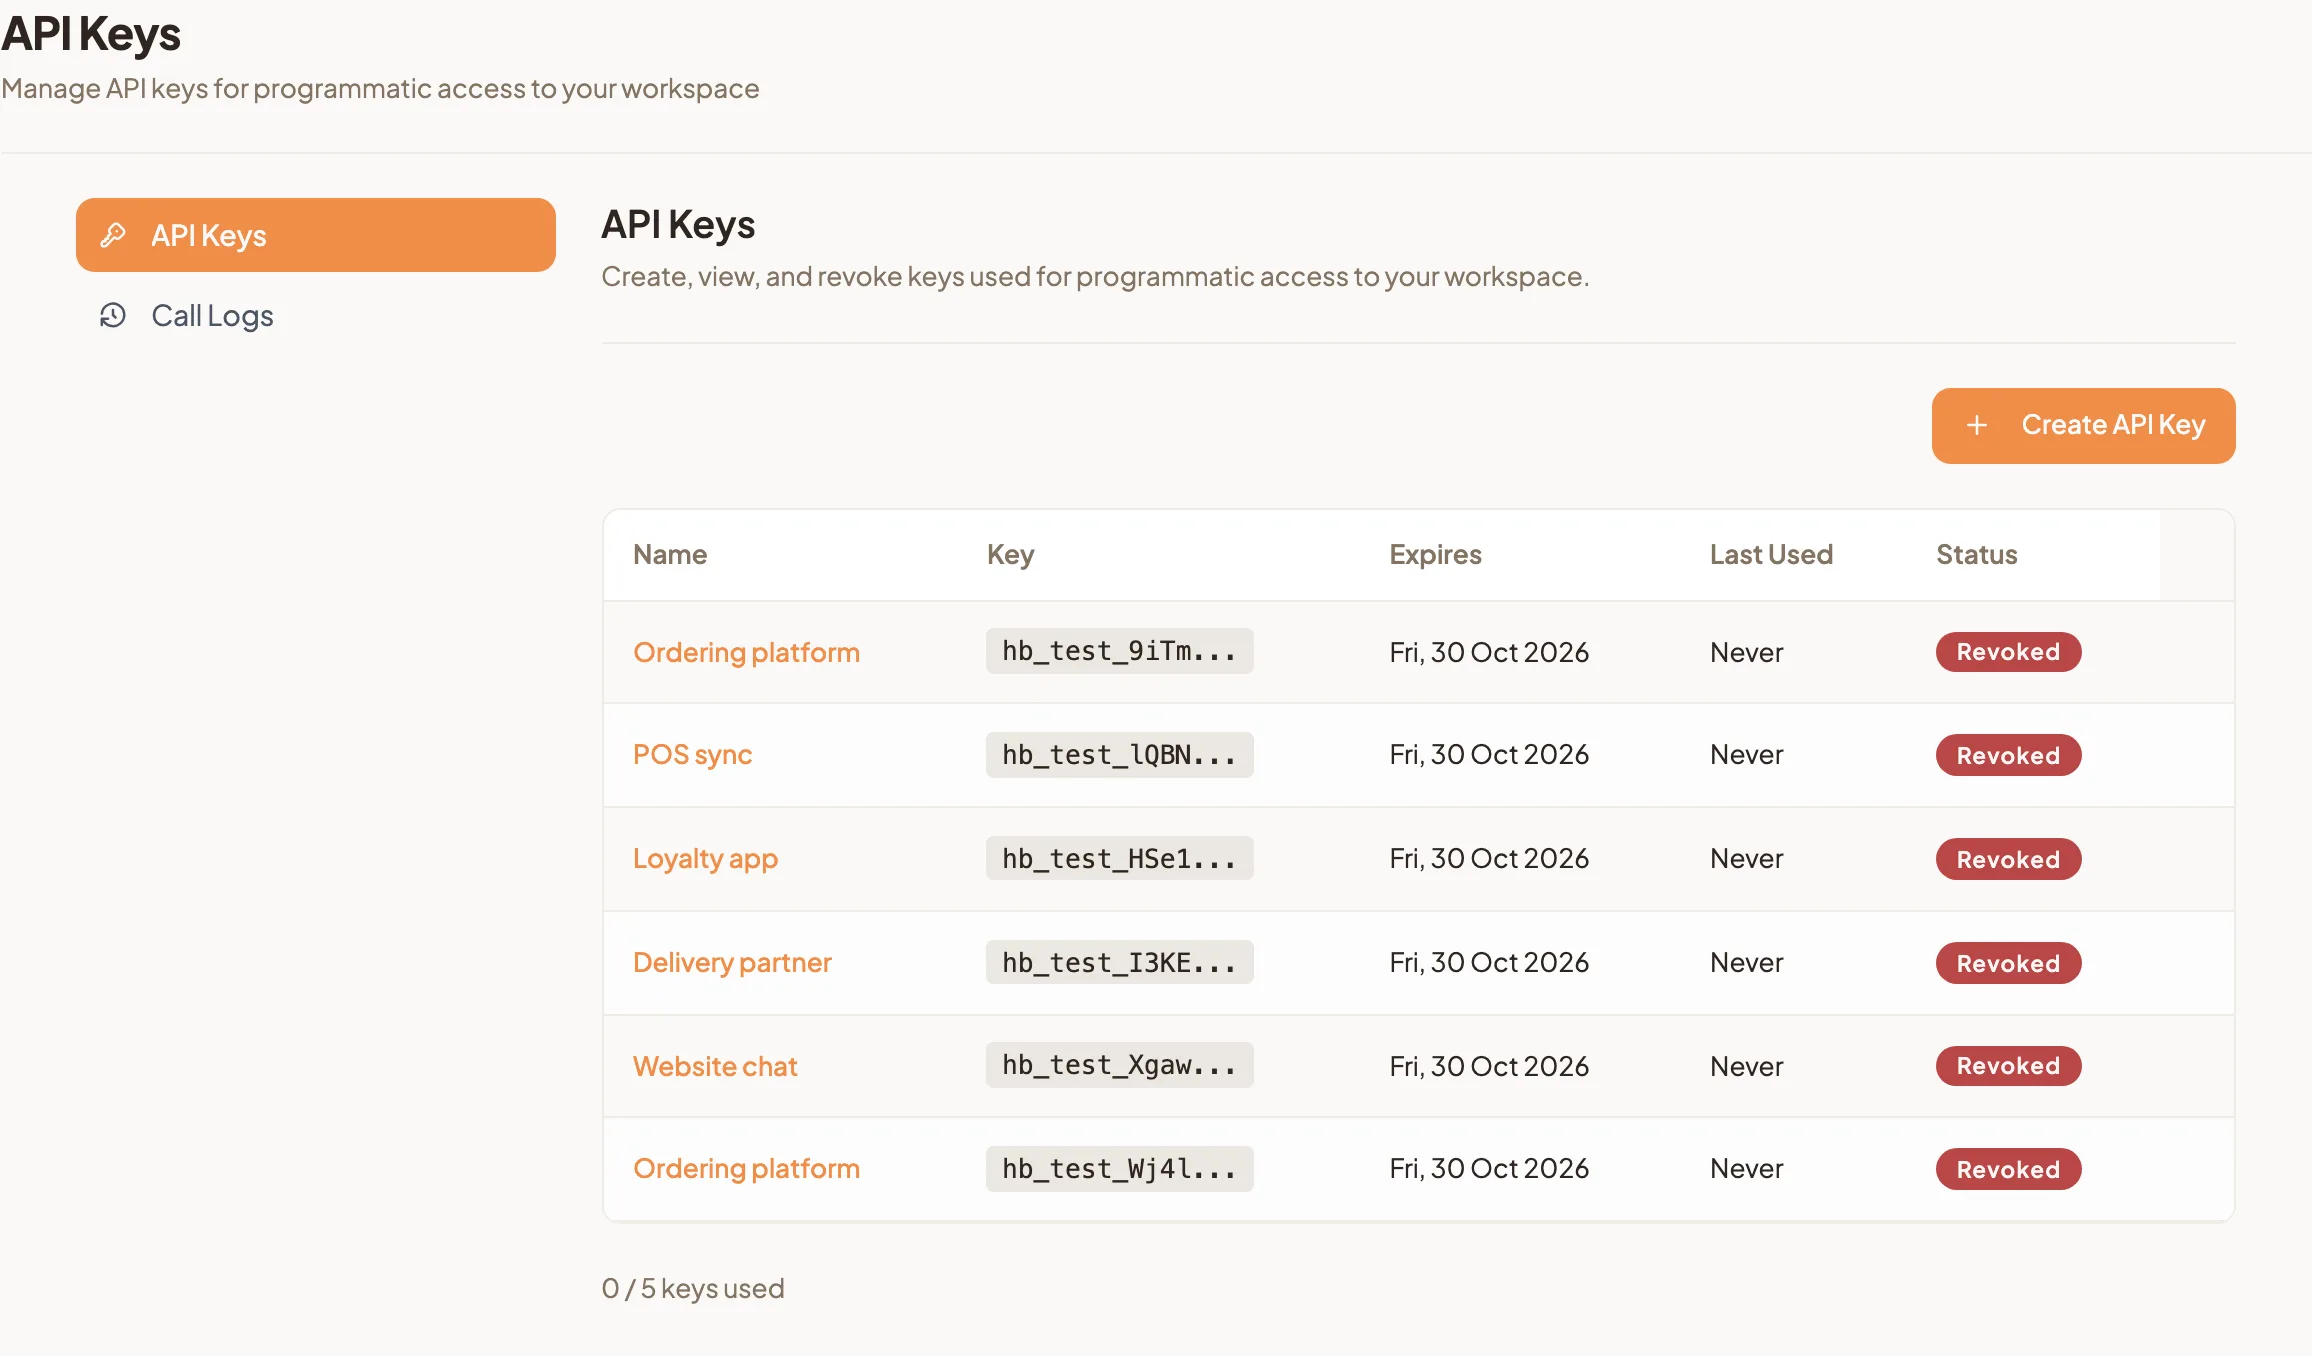
The API Keys tab lists each key with its Name, the first few characters under Key, Expires, Last Used and Status, which is Active or Revoked.
- Select a key's name to open API Key Details, with its name, scopes and expiry.
- A workspace can have up to 5 active keys. The count under the list shows how many you are using. At 5, Create API Key is unavailable until you revoke one you no longer need.
Revoke a key
- Select the bin icon at the end of the key's row.
- Select Revoke Key to confirm.
Check what a key has been doing
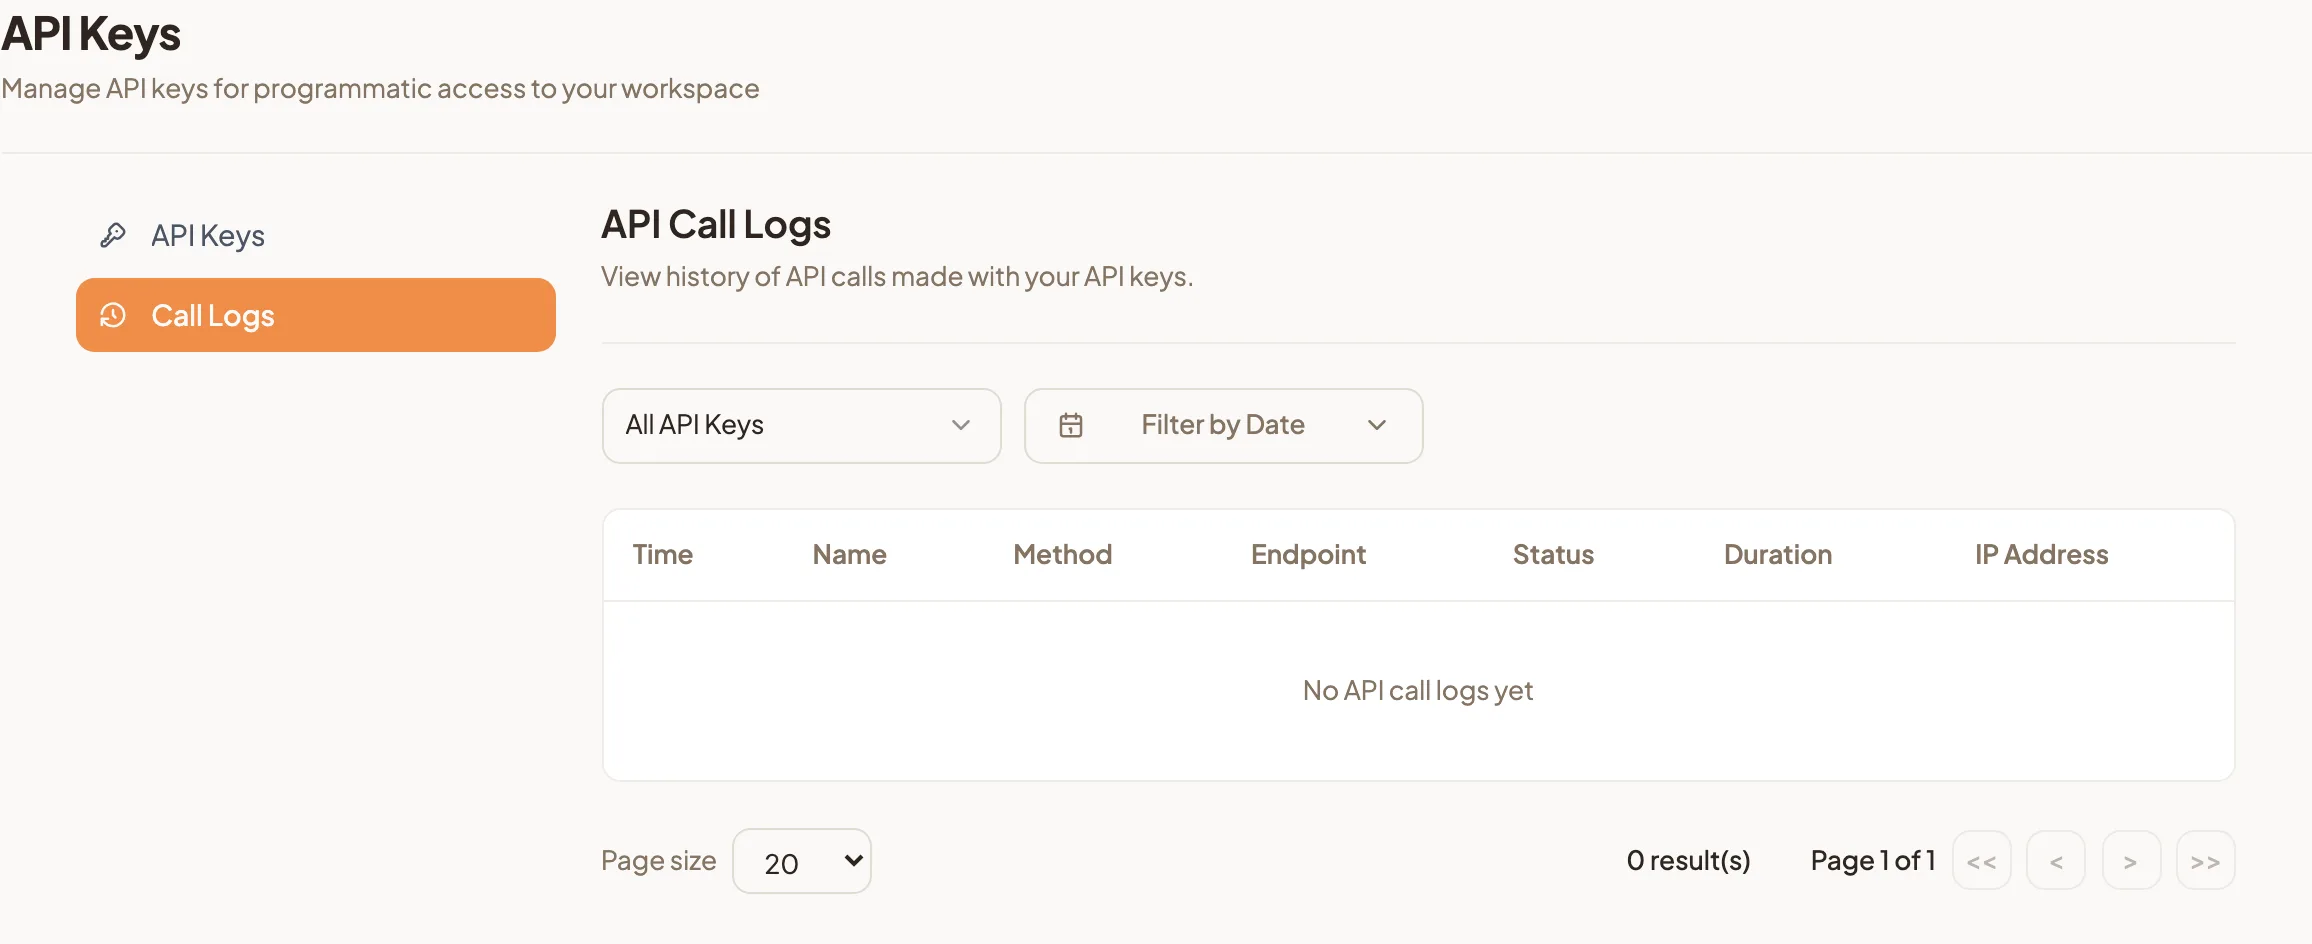
The Call Logs tab lists every call made with your API keys. It is the first place to look when a provider tells you their connection is not working.
- Open the Call Logs tab.
- Choose a key from All API Keys to see only its calls.
- Use Filter by Date to narrow it down to when the problem happened.
Each call shows the Time, the key Name, Method, Endpoint, Status, Duration and IP Address. A status in red means the call did not work, which is useful to share with the provider.
From here, the order-ready message goes out without anyone on your team typing it.