
Group your contacts with labels
Quick answer
Go to Contacts, then Labels, and select New Label to create one with a name, colour and optional description. Labels you put on contacts let you filter chats and contacts, and choose exactly who receives a campaign.
Your new durian cheesecake launches on Friday, and you only want to tell the customers who ordered durian anything last season. Not the whole list of 3,000, and definitely not the ones who asked you to stop.
A label is a tag you put on a contact, such as Durian fans, VIP or Catering lead. Labels turn one long contact list into groups you can find, filter and message on their own, so Friday's launch goes to the 200 people who will actually want it.
With labels you can:
- Group customers by what they buy, how often they come, or where they found you.
- Give each label its own colour so it stands out in the chat list.
- Filter the chat lobby and All Contacts down to one group.
- Send a campaign to one or more labels instead of your whole list.
- Tag a whole imported file at once.
Before you start
- You are signed in as an Admin or a Support Agent. Both can create, edit and delete labels.
Create a label
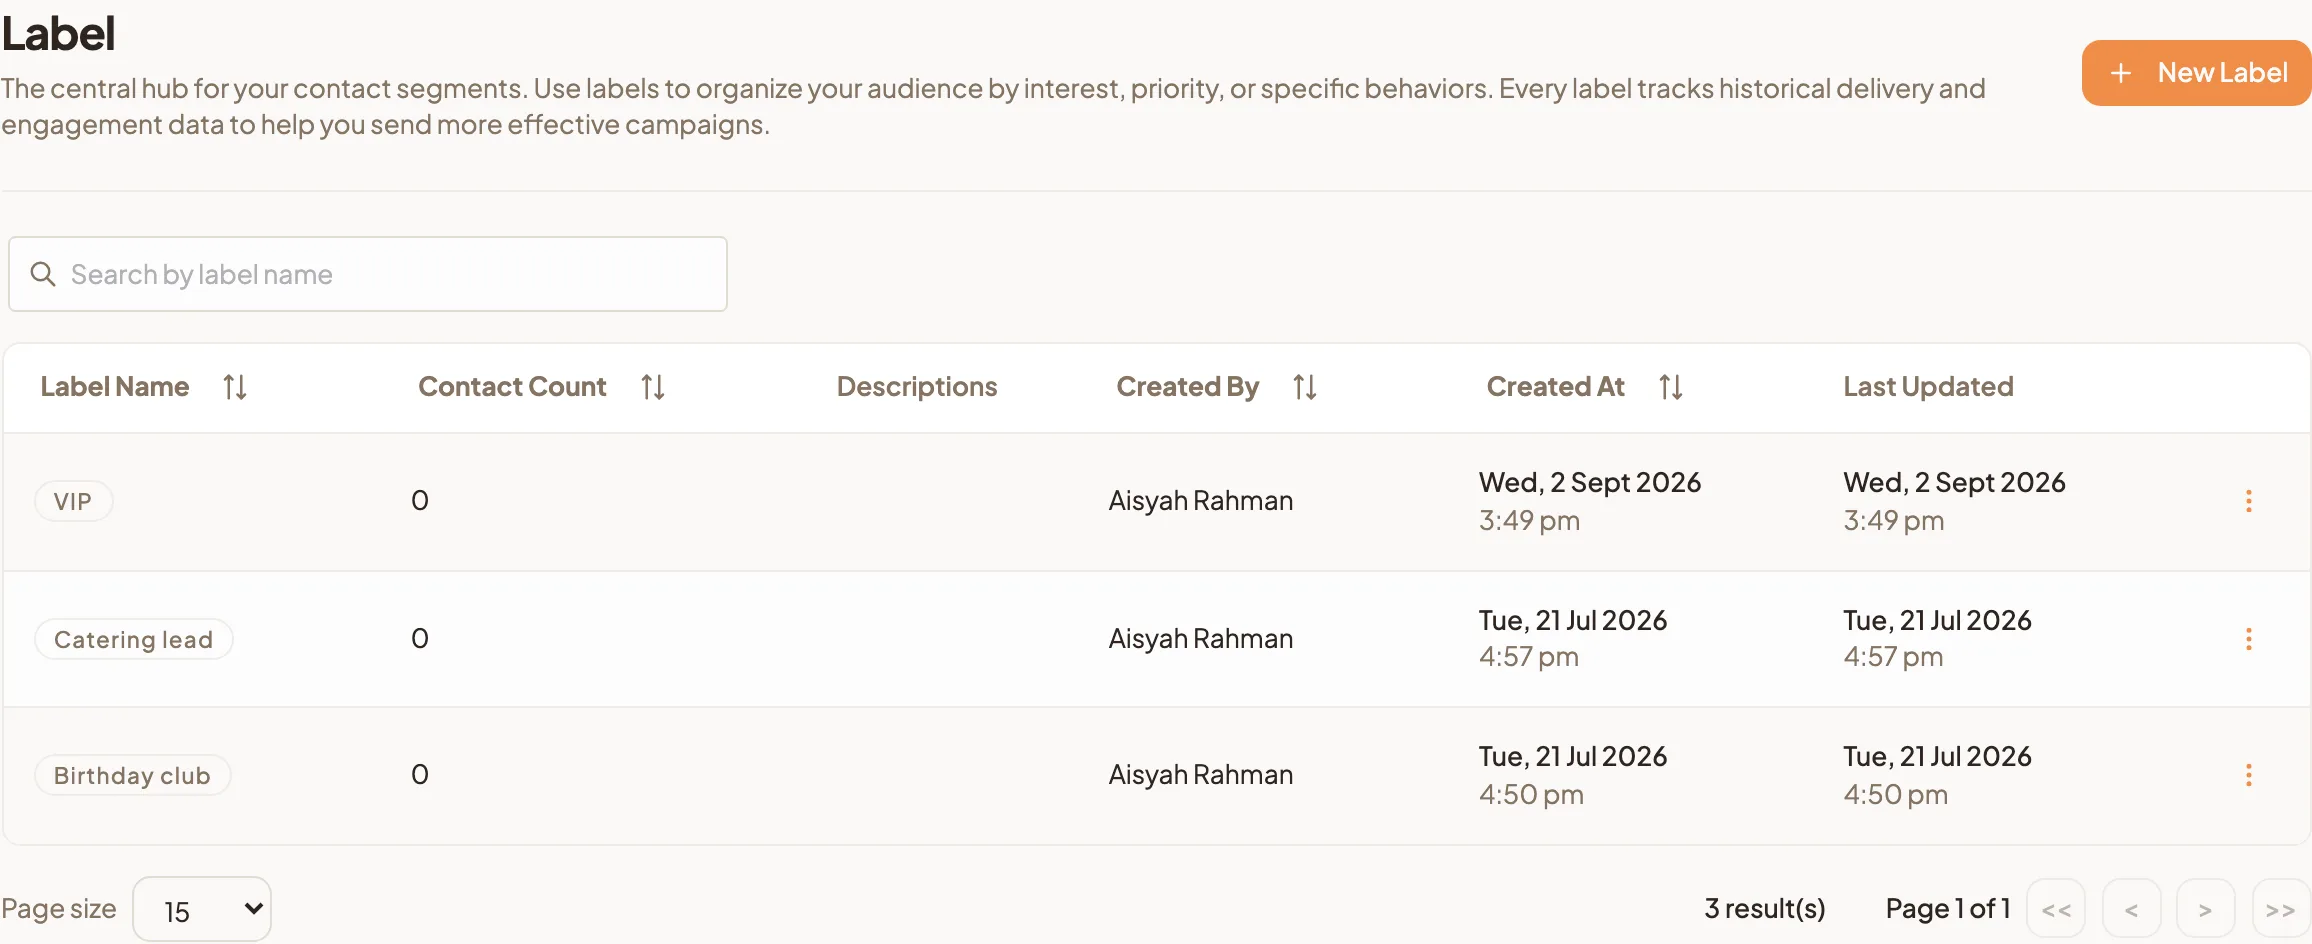
- Go to Contacts, then Labels.
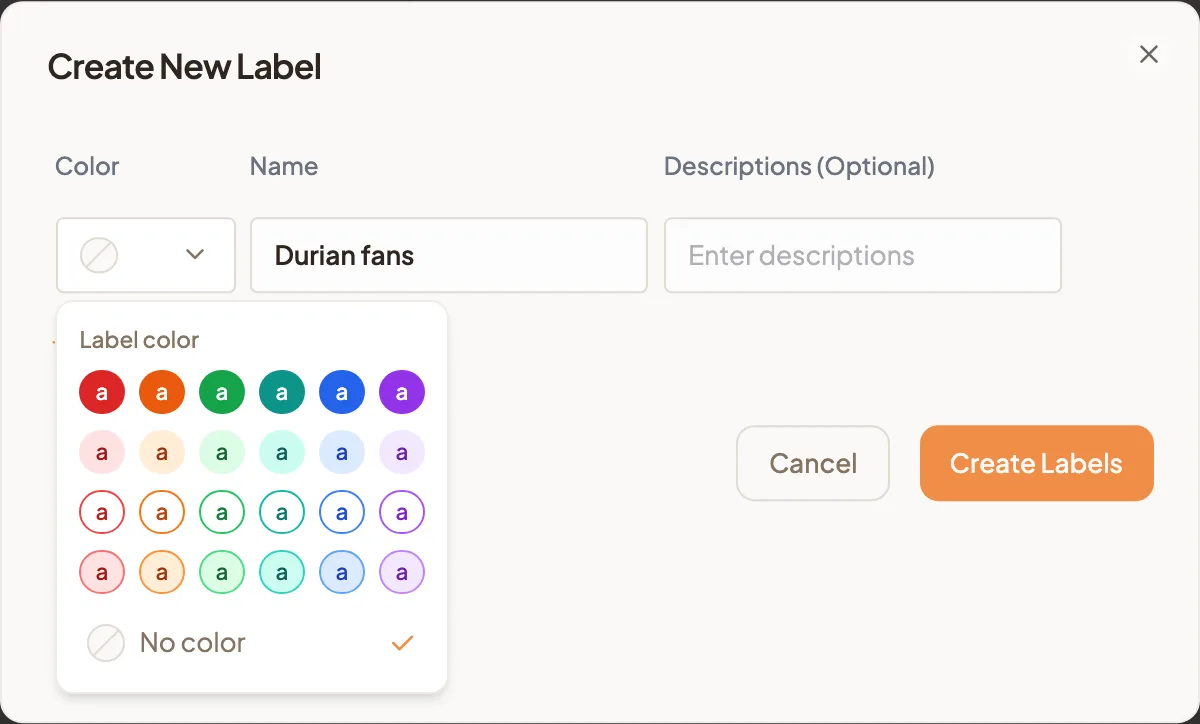
- Select New Label. Create New Label opens.
- Type the Name, for example Durian fans.
- Select the colour dot next to it and choose a colour. You can also choose No color.
- Add a short note under Descriptions (Optional) so your team knows when to use it, such as "Ordered durian items in 2025 or 2026".
- To make several labels in one go, select Add New Label for another row.
- Select Create Labels.
Label names are not case-sensitive, so VIP and vip are the same label.
You can also create a label on the spot while you are tagging a contact, a chat or an import. Type the new name in the label list and choose the option to create it.
Choose a colour
The colour picker offers six colours, Red, Orange, Green, Teal, Blue and Purple, in four styles: Solid, Pastel, Outline and Tinted.
Pick colours your team can read at a glance. For example, keep red for customers who need care, such as complaints, and green for your best regulars. Labels show on each chat in the lobby, so a colour does half the work before anyone reads the name.
Edit a label
- Go to Contacts, then Labels.
- Search for the label in Search by label name if the list is long.
- Select the menu (⋮) at the end of its row and choose Edit.
- Change the colour, Name or Descriptions (Optional).
- Select Save.
The change shows everywhere the label is used, on every contact and chat that carries it.
Put labels on contacts
There are four ways, depending on where you are:
- One contact: open their Contact Details, pick labels under Labels, and select Save.
- Many contacts: in All Contacts, tick the rows and select Assign Labels.
- Many chats: in the chat lobby, choose Select Chats from the menu (⋮), tick the chats and select Assign Labels.
- A whole file: pick Global Labels when you import contacts.
The Contact Count column on the Labels page shows how many contacts carry each label.
Use labels to target a campaign
When you create a campaign, Filter by Labels decides who receives it. Pick Durian fans and the launch goes only to contacts with that label. Pick several labels to reach anyone who has any of them.
If you leave Filter by Labels empty, the campaign goes to all your contacts. That is rarely what you want for a product launch, so choose at least one label. A consent label such as Promotions opt-in also keeps you on the right side of WhatsApp's rules; see How do I manage opt-in in HeyBirdy?
The same labels work elsewhere too:
- In the chat lobby, Filter by Label shows only the chats from that group. See Chat lobby.
- In All Contacts, the Labels filter narrows the list, and Export gives you a file of that group alone.
Label as you go, and each campaign after that goes to a smaller, warmer audience.
Delete a label
- Go to Contacts, then Labels.
- Select the menu (⋮) at the end of the label's row and choose Delete.
- Read the warning in Delete Label, then select Delete This Label. To back out, select Keep This Label.